How to Add a Schedule in GrazeCart
How to Add a Schedule in GrazeCart
One of the key elements of your GrazeCart website is setting your schedule for Pickup Dates and Order Windows. Your Pickup Dates are the days when your customers can pick up or expect delivery of their order, while the Order Window is the date range they have to place an order during in order to get their products on the expected Pickup Date.
For example, if you have a Pickup Date of Thursday, June 11, your Order Window could be Sunday, May 31 through Sunday, June 7. So anyone who orders on your website between May 31 and June 7 will have a Pickup Date of June 11.
Adding a schedule is pretty straightforward, however, there are a few points that are important to remember when adding a new schedule to ensure you have complete calendar coverage for your customers.
Adding a Schedule in GrazeCart
1. After logging in, navigate to Logistics in the main menu then Schedules in the dropdown menu.
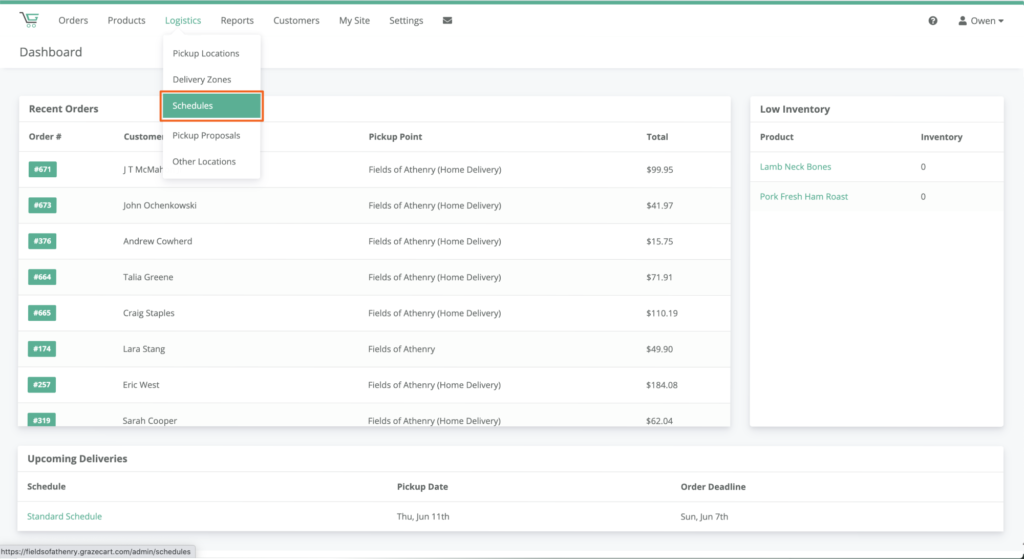
2. Click Add Schedule
3. Name the new schedule
4. Click Add Dates
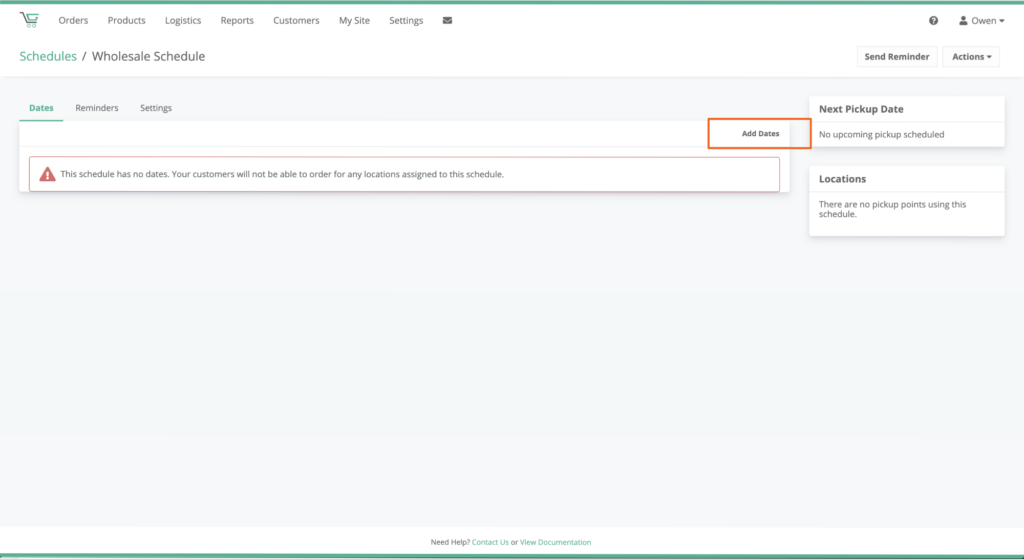
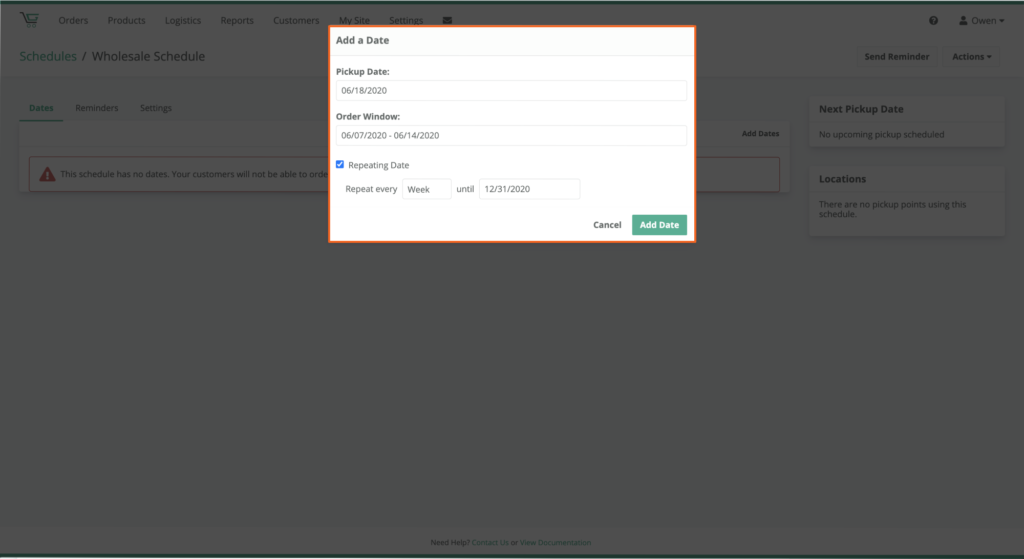
5. Select your Pickup Date. This date is when you offer on-site pickup, home delivery, or when you send your shipments.
6. Select your Order Window. The Order Window needs to close before your Pickup Date. You want to ensure that your Order Windows line up with (or overlap) each other so that you don’t have a time on your website when someone wouldn’t be able to place an order. For example, if your Pickup Date is Thursday, you might set your Order Window from Sunday to Sunday. If your Order Window was Sunday to Friday, then customers would not be able to order on Saturday.
7. If there’s a regular cadence to the schedule, you can tick Repeating Date and assign how often you’d like the schedule to repeat and until when.
8. Click Add Date
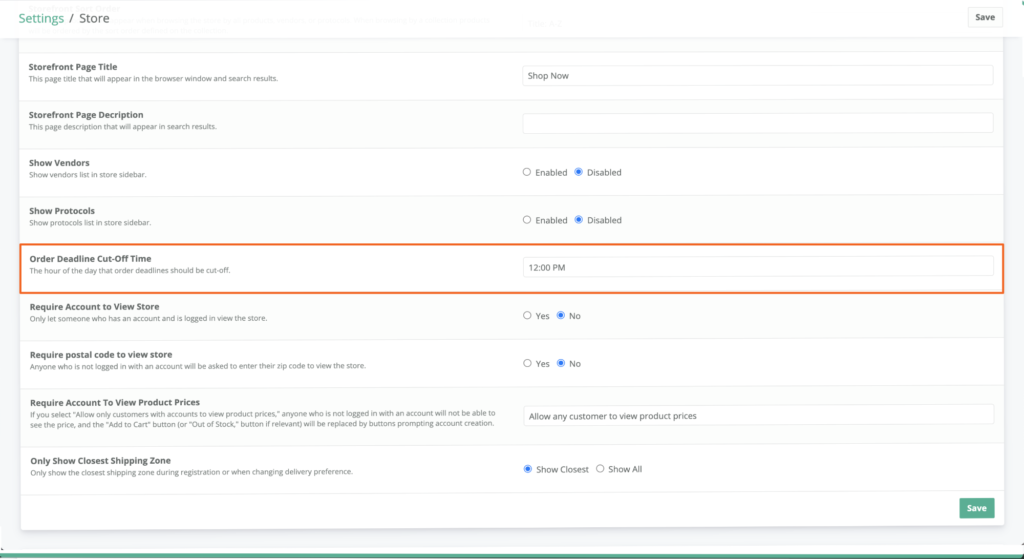
9. Now that you have the pickup date and order window dates set, you’ll want to adjust the order deadline time. To do that, navigate to Settings in the main menu then click Store.
10. Scroll down to Order Deadline Cut-Off Time and set the time you want your order deadline to be. For example, if you wanted your order deadline to be every Sunday at noon, set the time to 12:00 PM. Now, your order window will go from Sunday at 12 p.m. to Sunday at 12 p.m. leaving no time where customers can’t place an order.
11. Now that you have your order deadline time set, you’ll want to add the locations where this schedule is applicable. To do that, navigate to Logistics in the main menu then Pickup Locations in the dropdown menu.
12. If you’ve already created the location you want to attach to this schedule, click the name of the location.
13. In the right sidebar, you’ll see a Schedule widget. Click TBA (or the current schedule you have assigned) then in the dropdown menu, select the schedule you want to assign to this location.
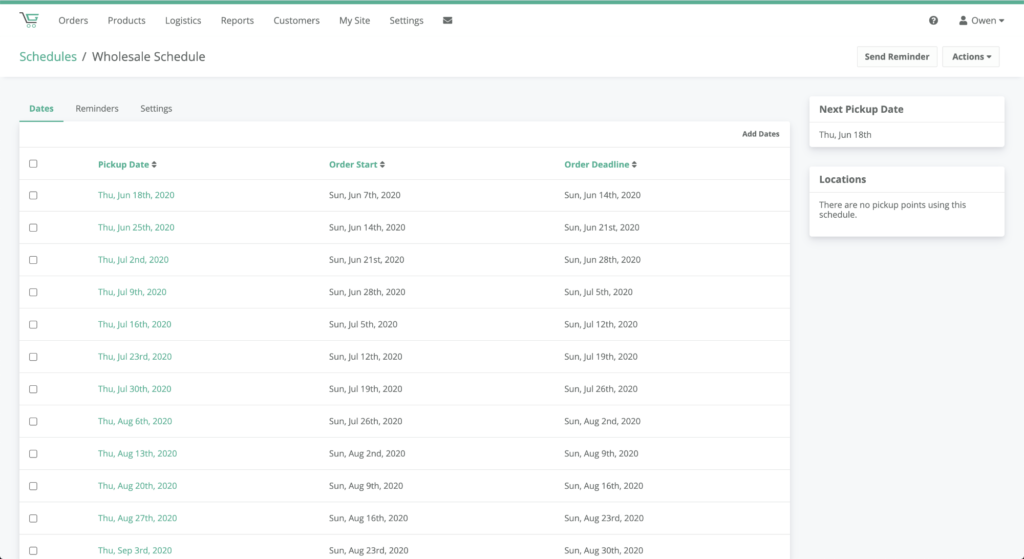
14. Your schedule is ready to go!

